

Calling Tickets |

|

|

|

|
||
|
Calling Tickets |
|
|
|

|

|
Calling Tickets
|
Calling Tickets |
|
|
|
|
||
|
Calling Tickets |
|
|
|
|
|
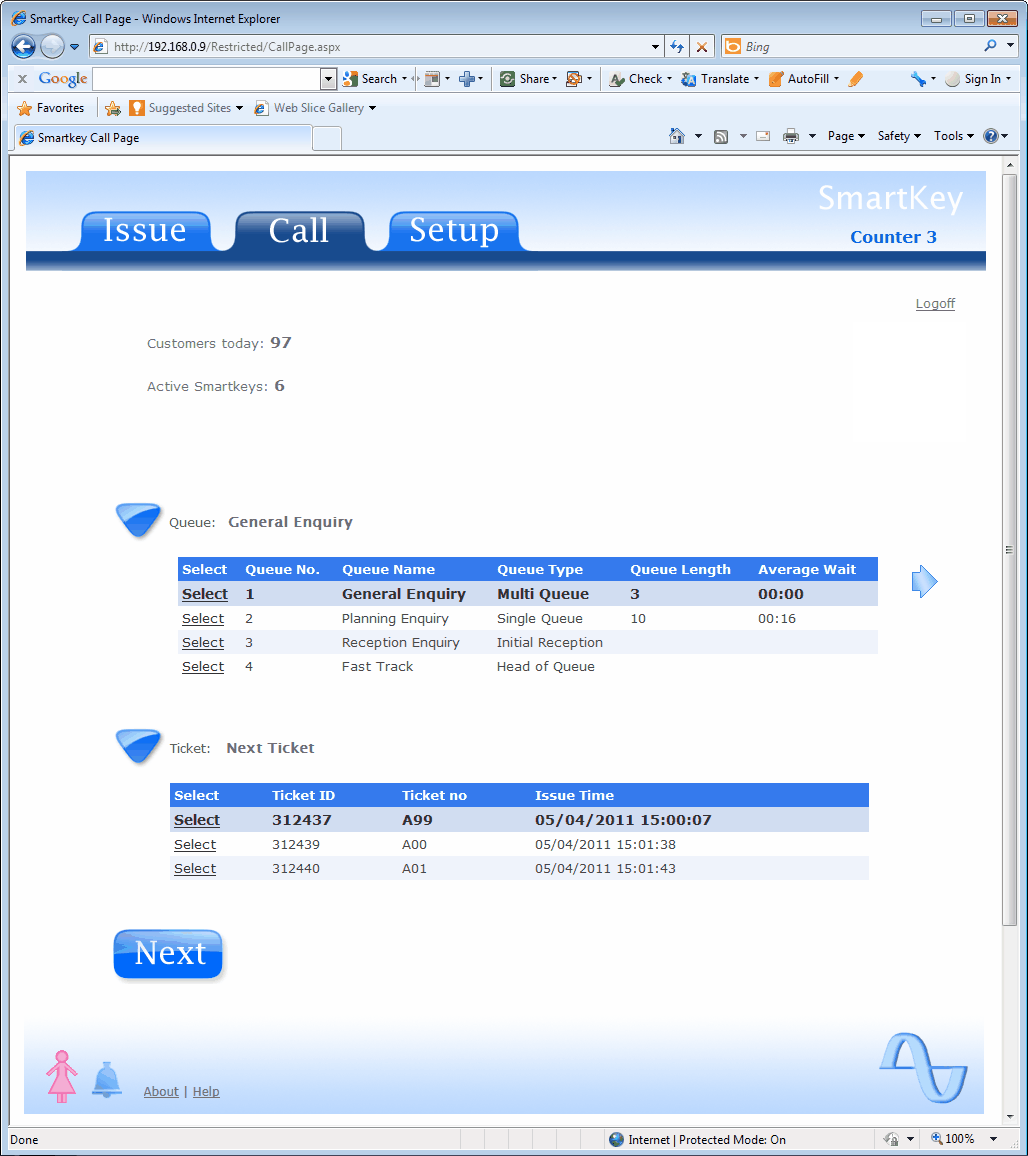
Calling a Customer for Service
First select the Queue you wish to call a ticket from by clicking the 'Select' next to the desired Queue. Note: If the list of available Queues is not on display, Click the triangle next to 'Queue' to display the list.
The list shows the type, the queue length and and the average waiting time for each Queue. If you Click the ticket triangle you can see all the tickets in the selected Queue and the time the ticket was issued. In most queueing applications tickets are served in sequence. If you wish to call a specific ticket out of sequence you can by first clicking 'Select' to highlight the ticket. If you do this the 'Next Ticket' text will change to show the selected ticket no.
When the Next button is clicked the Next available ticket or if you selected a ticket, your selected ticket, is called for service. Once the call has finished announcing on the attached smartMonitors / chime units the SmartKey screen will change to show serving information. The little Man / Woman Icon represents the sex of the voice that will be used for announcements. Click to toggle between Male and Female.
If a Customer arrives unannounced, without a ticket, you can still record the visit by Creating an instant ticket record.
|
|
Just select the required Queue and Click the arrow to the right of the Queue list. |
|
The Bell Icon, if enabled, will sound an alert you when a Queue first forms.
Note: If you select a Queue with a Queue Type of 'Head Of Queue' there will be no tickets to display and the Ticket Arrow will be hidden. When you click the Next button the Queue Management System will direct the person at the Head of the Queue to your position.
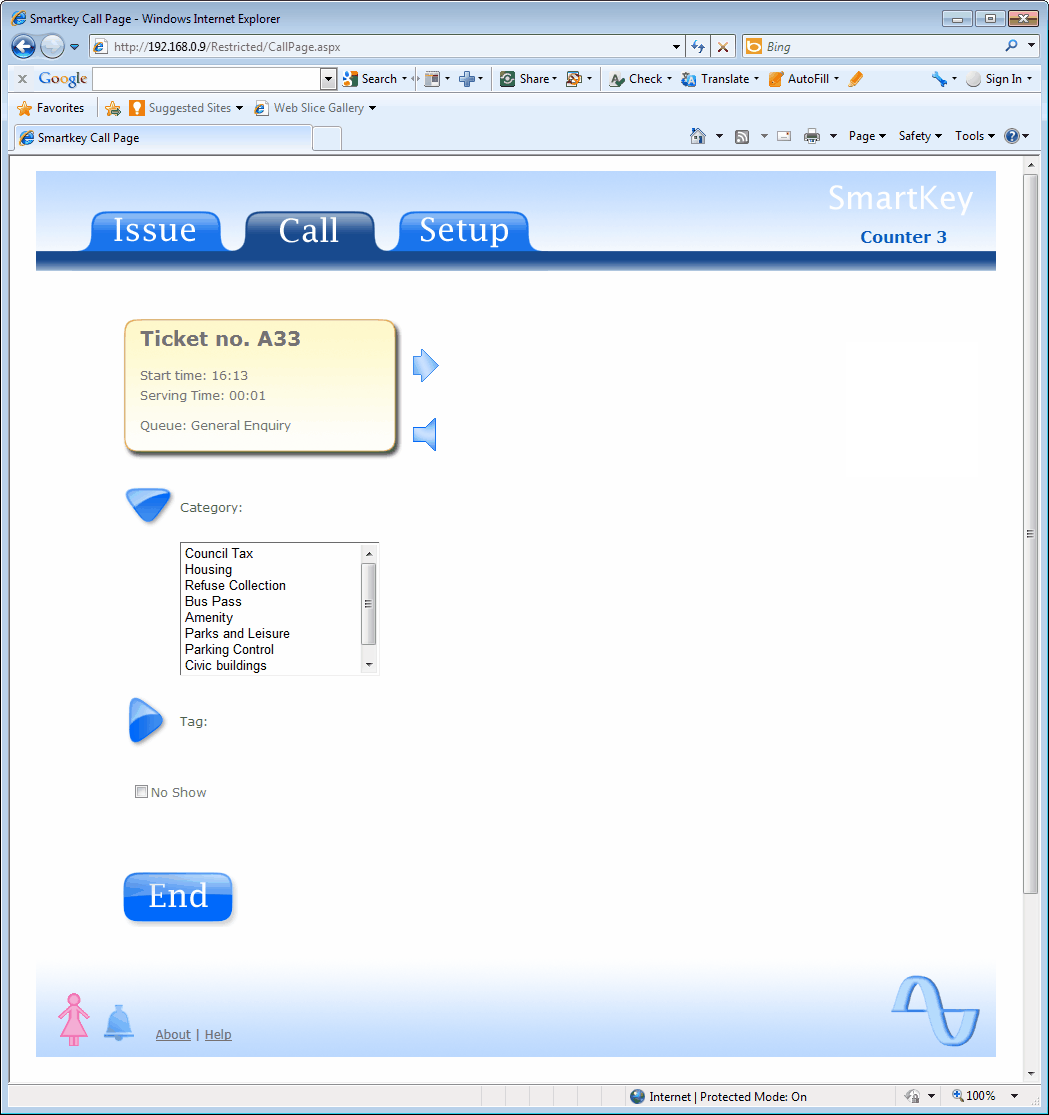
Serving a Customer
Initially the screen shows the ticket being served with the Time the Ticket was Issued and the Length of Time the Customer waited. After a minute this changes to show the Start Time and the Serving Time.
If the Customer fails to show up, the ticket can be re-announced by clicking the speaker icon. If the Customer still does not appear, the ticket can be marked as a no show by clicking the 'No Show' checkbox at the bottom of the screen then clicking the END button to finish serving.
Once the Customer has arrived, the type of visit can be selected by clicking the triangle next to 'Category'. The category can then be selected by clicking the desired option in the List Box that has appeared with the mouse . Multiple categories can be selected at once by holding down the ctrl key and clicking with the mouse.
Tags are similar to Categories and allow additional information to be attached to a ticket record.
Once the Customer has been dealt with click END to close the call. An example ticket serving page is shown below:
If there is a blue arrow next to the Ticket it signifies that the ticket can be transferred to another Queue. Click the arrow to display a list Queues that you can transfer the current ticket to.
Note: The values for the Categories and Tags are setup by the Queue Management System Administrator using SmartCenter.
Printer Status Icon
If your Queue management System uses the Ctronix Wall Mounted ticket Printer and SmartPrinter has status reporting enabled a printer Icon will be shown on the Call Page in the Top Right.
A green dot on the printer signify the printer is working correctly. Yellow signifies the printer is running low on paper. Red signifies an error and there will also be a Red Ink error message detailing the cause of the error.